USEFULBUTUNUSED FEATURESOF MS OFFICE, GMAIL, TALLY
All of us use MS Office applications like Excel, Word and Power Point. Many use Google’s mail service i.e. Gmail and accounting software Tally for our clients. This article covers certain features of these applications/services which are free of cost and easy to use.
- Clickable Links in PDFs
Majority of us send regular updates to our clients on various taxation amendments, due date reminders, etc. in Portable Document Format (PDF). Usually, such content is prepared in Power Point (PPT) and then exported/converted to PDF format. A large section of the readers of such content will read it on their smart phones. So, depending on the content, what if there are images/ words in the PDF, clicking on which can help the reader visit any website/webpage or email or even text someone?
That is possible using “Hyper Link” function in PPT. Steps:
→ Select the text or image in the PPT on which you want the hyperlink.
→Go to Insert – Hyper Link – Link to Existing File or Web page (or Email Address)
→ In the Address field mention the link
For Web Browsing: “https://www.abcxyz.com/xyz”(Mention complete website link) For Email: “mailto:abc@xyz.com” (Mention email address)
For Text (via WhatsApp): “https://api.whatsapp.com/send?phone=+91xxxxxxxxxx” (Mention mobile number)
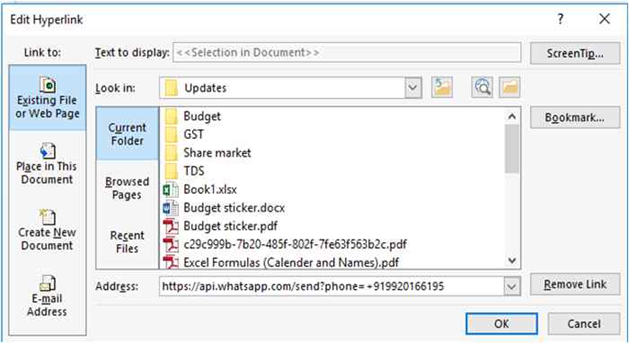
PPT files containing such hyperlinks should be exported to PDF format. The link will work when the reader clicks on the particular text/image in that PDF. This can also be used to make digital visiting cards.
- Multiple (but same) word documents in one click
It may so happen, that one particular document needs to be sent to multiple clients, but only a few details need to be changed per client. For Example, any letter (like auditor appointment acceptance letter), the format of whom may be the same for multiple clients, just that the name and address of the client be changed per letter. Usually in such situations, any junior article or office staff is given the responsibility to manually edit the required details from any client list which may be maintained in Excel files. But, what if all such documents can be created in one click, without manually editing details every time?
This is possible using “Mail Merge” function in Word. Steps (one time setup):
→ Prepare the required Word document and relevant Excel file. Ensure the data in Excel file is in Table format from cell A1. In the Word file, keep blank the areas need to be filled with Mail Merge (example name of client).
→ In the Word File, in the Mailings Tab, click on Select Recipients – Use an Existing List. Select the required the Excel file as Data source.
→ Now, again in Mailings Tab, click on Insert Merge Field and select the required fields (which will be headings of the table as mentioned in Excel file). Paste the heading along with the brackets in the areas which were kept blank earlier.
→ Click on Finish & Merge – Edit Individual Documents.
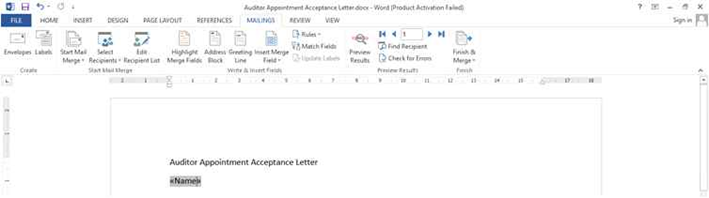
<<Name>> in this example represents the name of the client, mentioned as heading in the table of the relevant Excel file.
Using the steps given above, all the required word files can be made just in one click!
Similar mail merging can be done in Google sheets (integrated with Gmail) as well and this can be used to mention different email addresses, which in turn can help to send emails automatically.
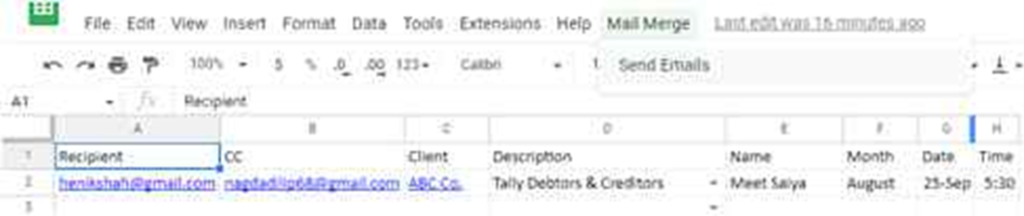
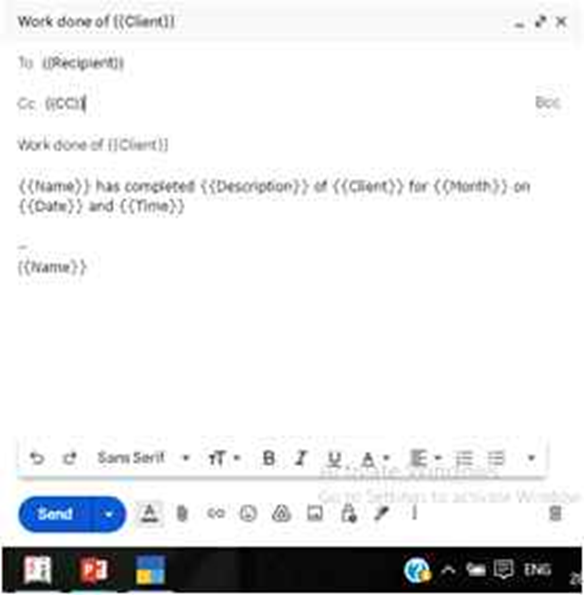
The screenshots used here are of an internal communication system between staff and partners.
For more on Gmail, kindly refer my article on “Gmail Tricks Everyone should know” published in March 2020’s edition of CVOCA’s News and Views. (https://drive.google.com/file/d/1mxPZPzargobJ4F5tEYwjvlcus-rnXg27/view?usp=sharing)
- Make Financials in Excel directly from Tally
Tally software has the integration of ODBC (Open Data Base Connectivity) helping data visualisation in Excel. Hence as the heading suggests, once suitably configured, we can make and view Financials of any company loaded in that PC’s Tally software, for any year whose data is available. Two things to know – one is Excel is only capable of viewing data as on ‘end of period’ using ODBC and two is that Tally Prime may have configuration issues.
Steps:
→ Enable ODBC Port by configuring Tally software to act as both Client and Server.
For Tally ERP: Press Ctrl + Alt + F (i.e. Configuration) then press F2 (Advanced Configuration)
For Tally Prime: Press Alt + Z (i.e. Exchange) then Data Synchronisation then Client/Server Configuration
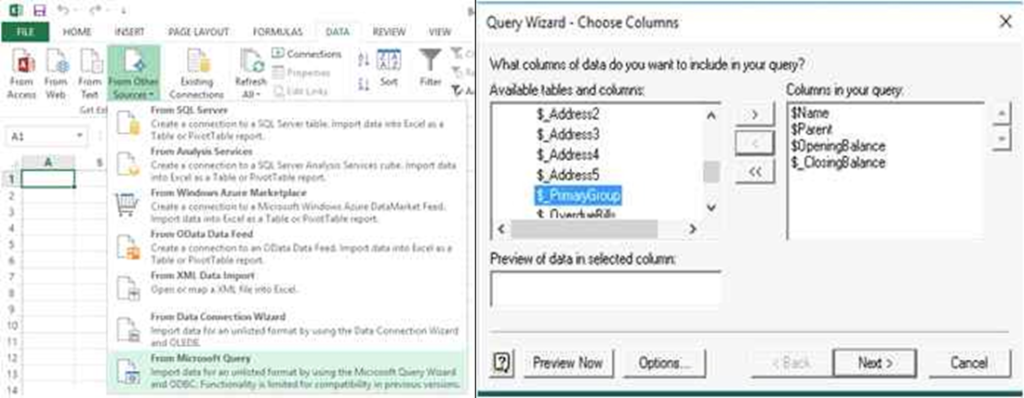
→ Open a new Excel Workbook. In the Data tab, select From Other Sources – From Microsoft Query
→ Select Tally ODBC 9000 from the drop down list
→ Then in Query Wizard (or Power Query depending on the version) select Ledger – Name, Parent (for Group of that Ledger), Opening Balance and Closing Balance
→ Now click on Next multiple times till it finally exports data to the Excel sheet
→ The form of this data is like any regular Trial Balance with opening and closing balances
→ This data can be viewed in Profit & Loss Account and Balance Sheet along with schedules format with suitable formulas
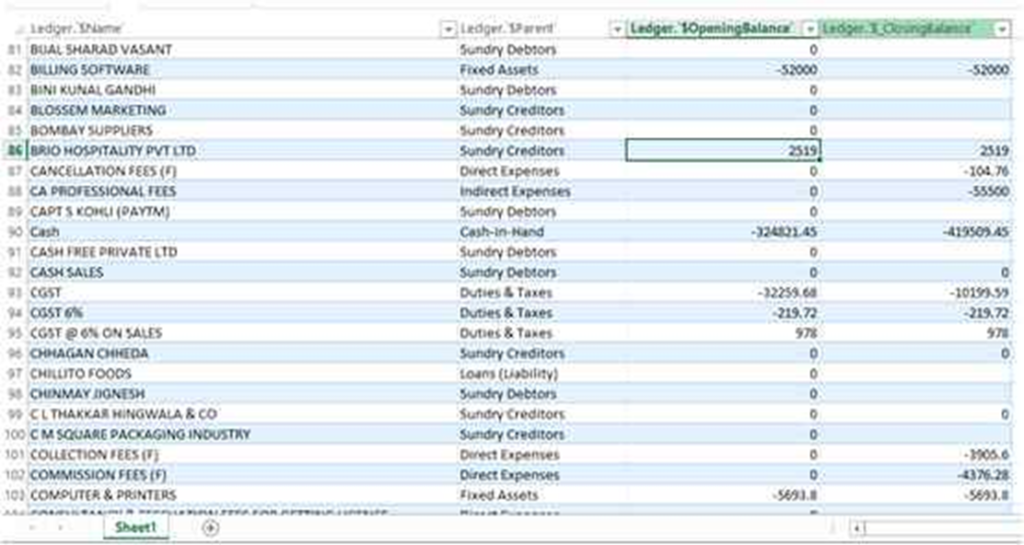
Debit Balances will be shown as negative and Credit Balances as positive. Formulas are needed to be given accordingly to automatically make the financial statements.
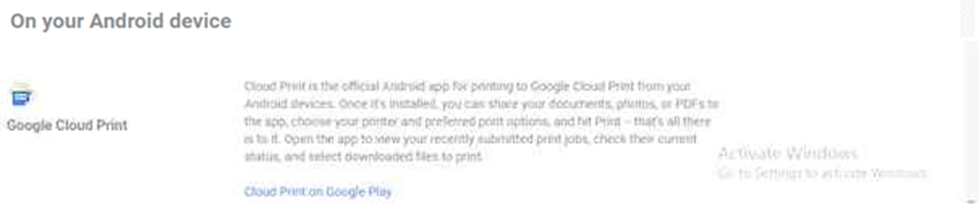
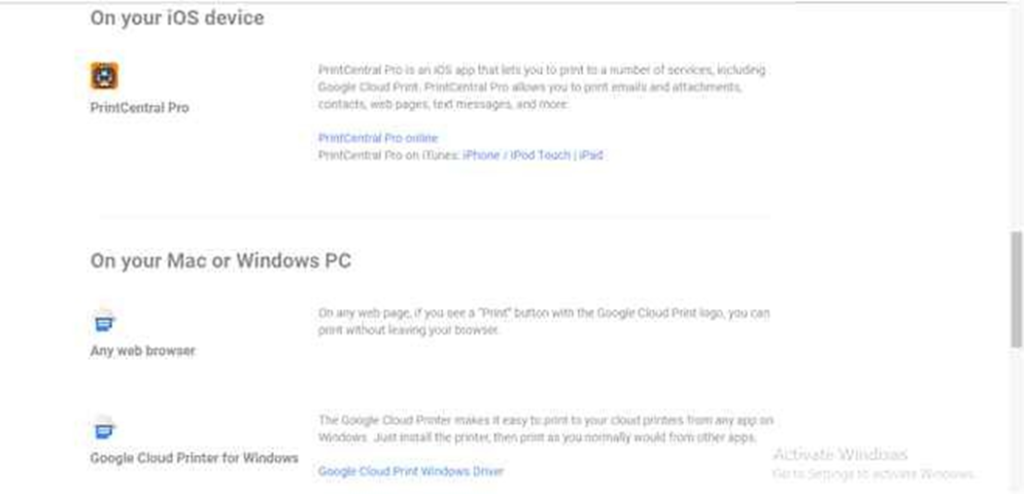
- Cloud Printing
Print any document from any mobile or computer to your office printer through cloud printing option. This shall work even for regular non-WiFi printers provided they are connected to a computer with a logged in Google account. Google is notorious for changing its settings and policies. Hence “Google” the latest steps once before proceeding ahead with cloud printing.
→ Open the Chrome browser, go to Settings> Advanced settings> Printing> Google Cloud Print> Manage Cloud Print devices (depending on the version).
→ A new web page will open up, which will ask you to add printer. Here it will ask to log in to the Google account.
→ Once done, it shows the printer to be registered, then by clicking on “Manage printer”, select the printer you want to share to other Google accounts.
→ Once the share invitation is accepted by such persons, they can also print from their phones or computers.
(You may need to install the Google cloud printing app on your phone, and the Google cloud printing driver on your computer from https://www.google.com/cloudprint/learn/apps/)